


eSim Activation Guide for iPhones
eSIM Installation for iPhone
Get connected in minutes. Follow this guide to activate your new eSIM and enjoy seamless connectivity.
Before You Begin
- 📱 Your unlocked iPhone
- 📧 The link in the email from us
- 📶 A stable 4G/5G or Wi-Fi connection
Method 1: Quick install Link Installation (Recommended)
-
1
Open Your Email
You will find a link (and a QR code) that guides you specifically to the page in step 2. Or you can alternatively ski Step 2 by click the install on iPhone link directly from the email
-
2
Click on the Quick install Link
Tap Quick install. When prompted, tap Done to add the eSIM to your iPhone

-
3
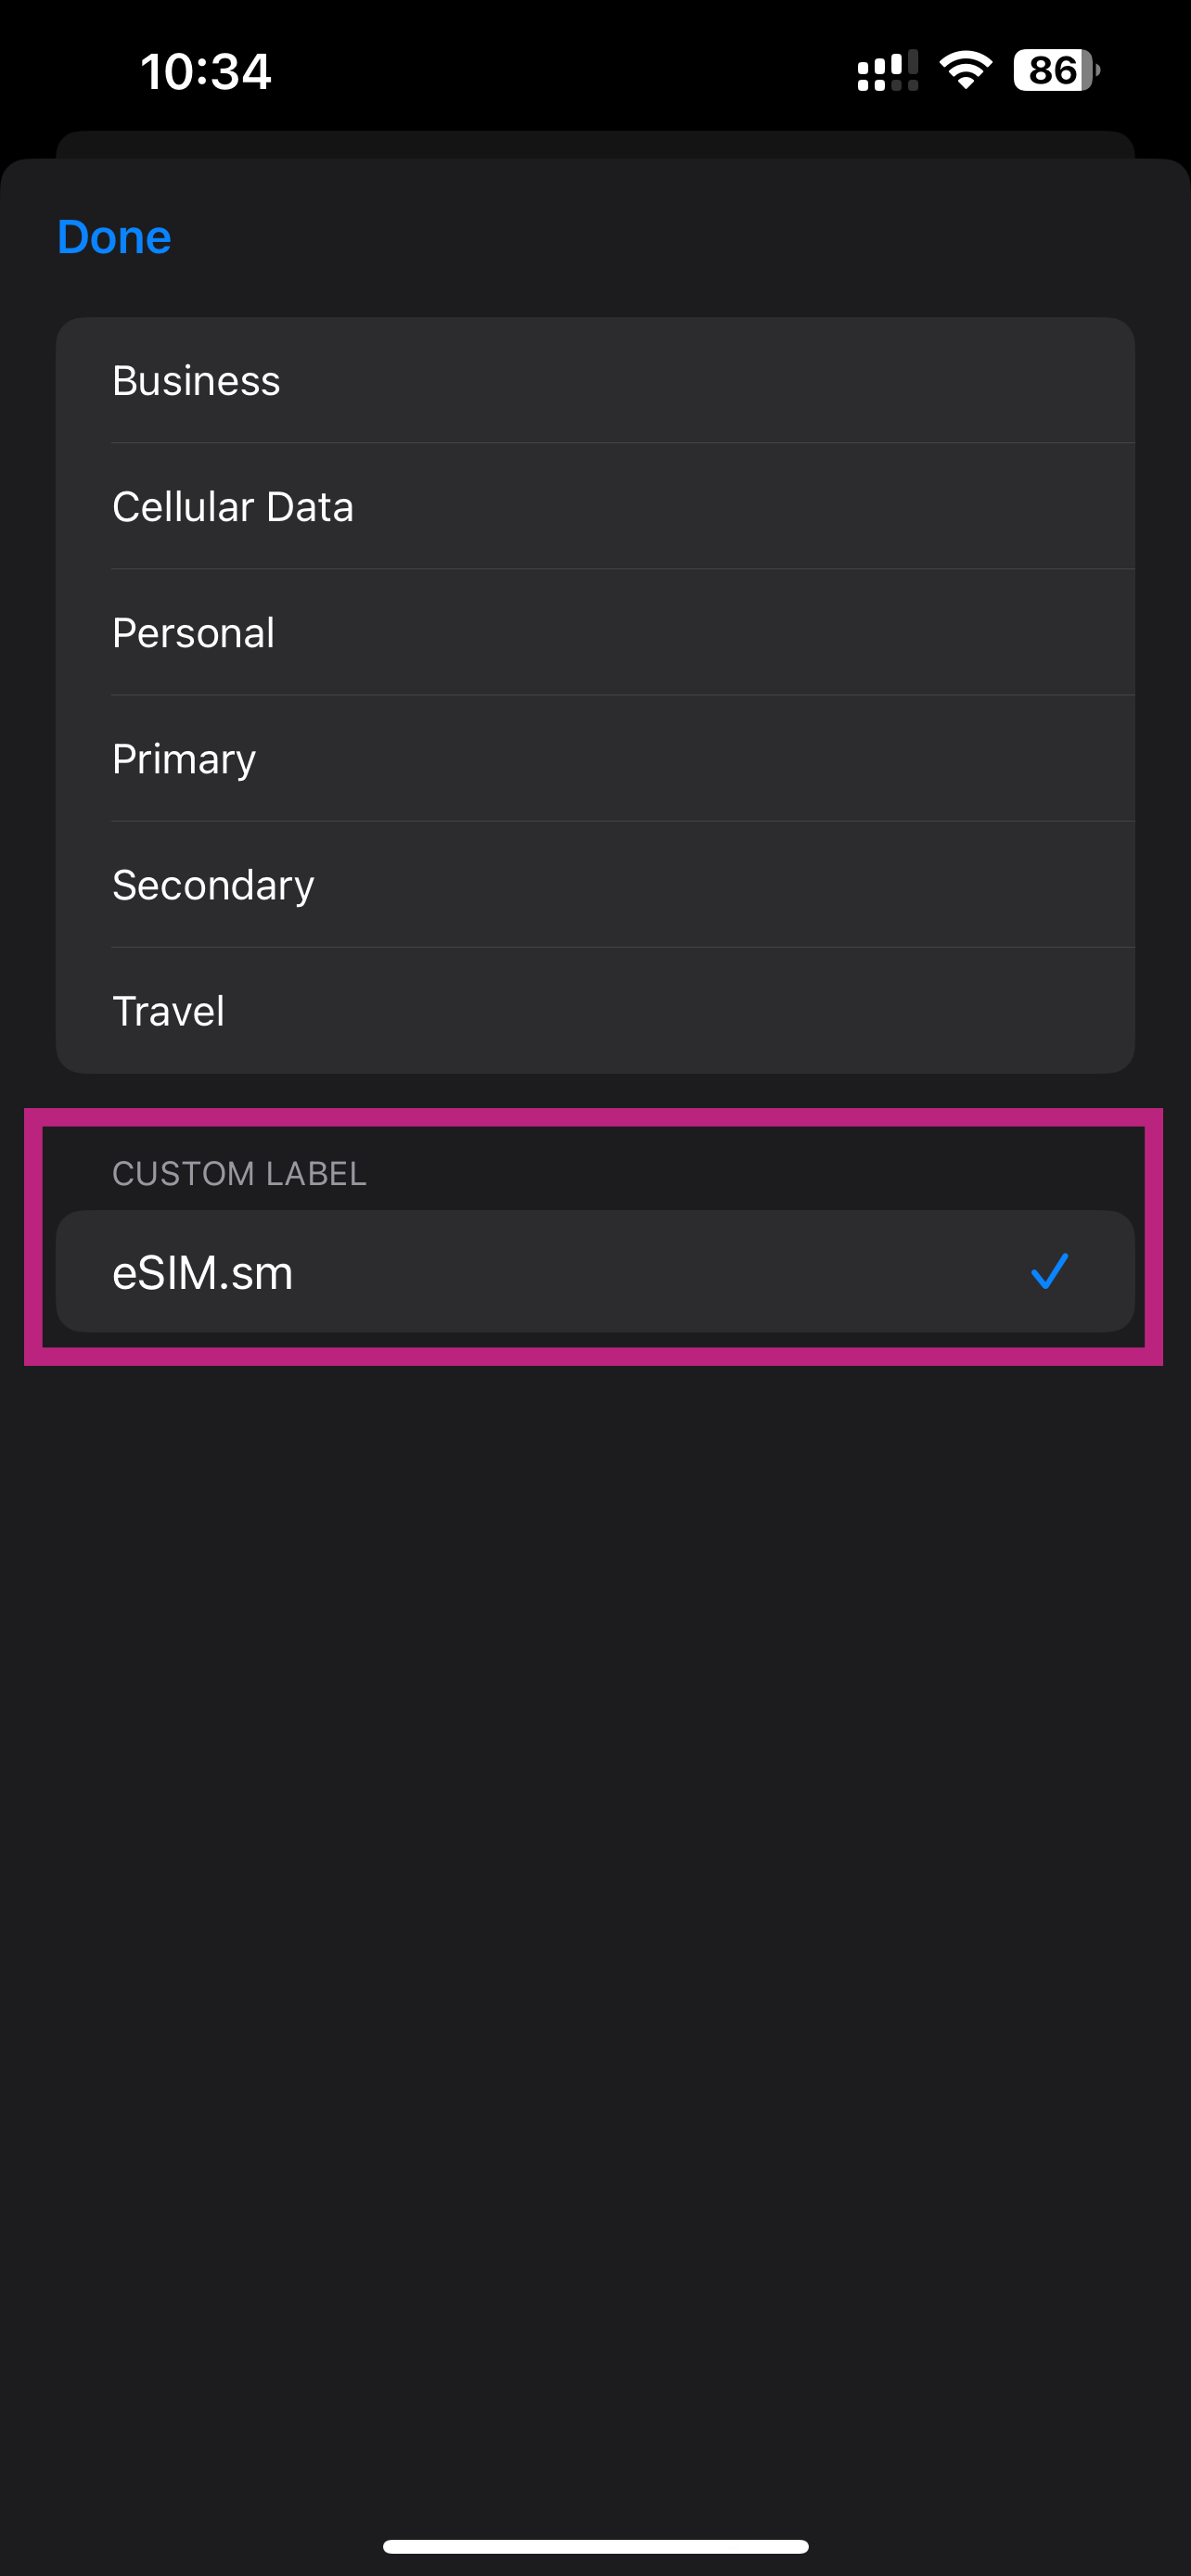
Label Your eSIM
Your iPhone will ask you to label your plans. Tap on your new plan (usually labeled 'Business' or 'Cellular') and choose a custom label like "eSIM" or "Travel" for easy identification.
-
4
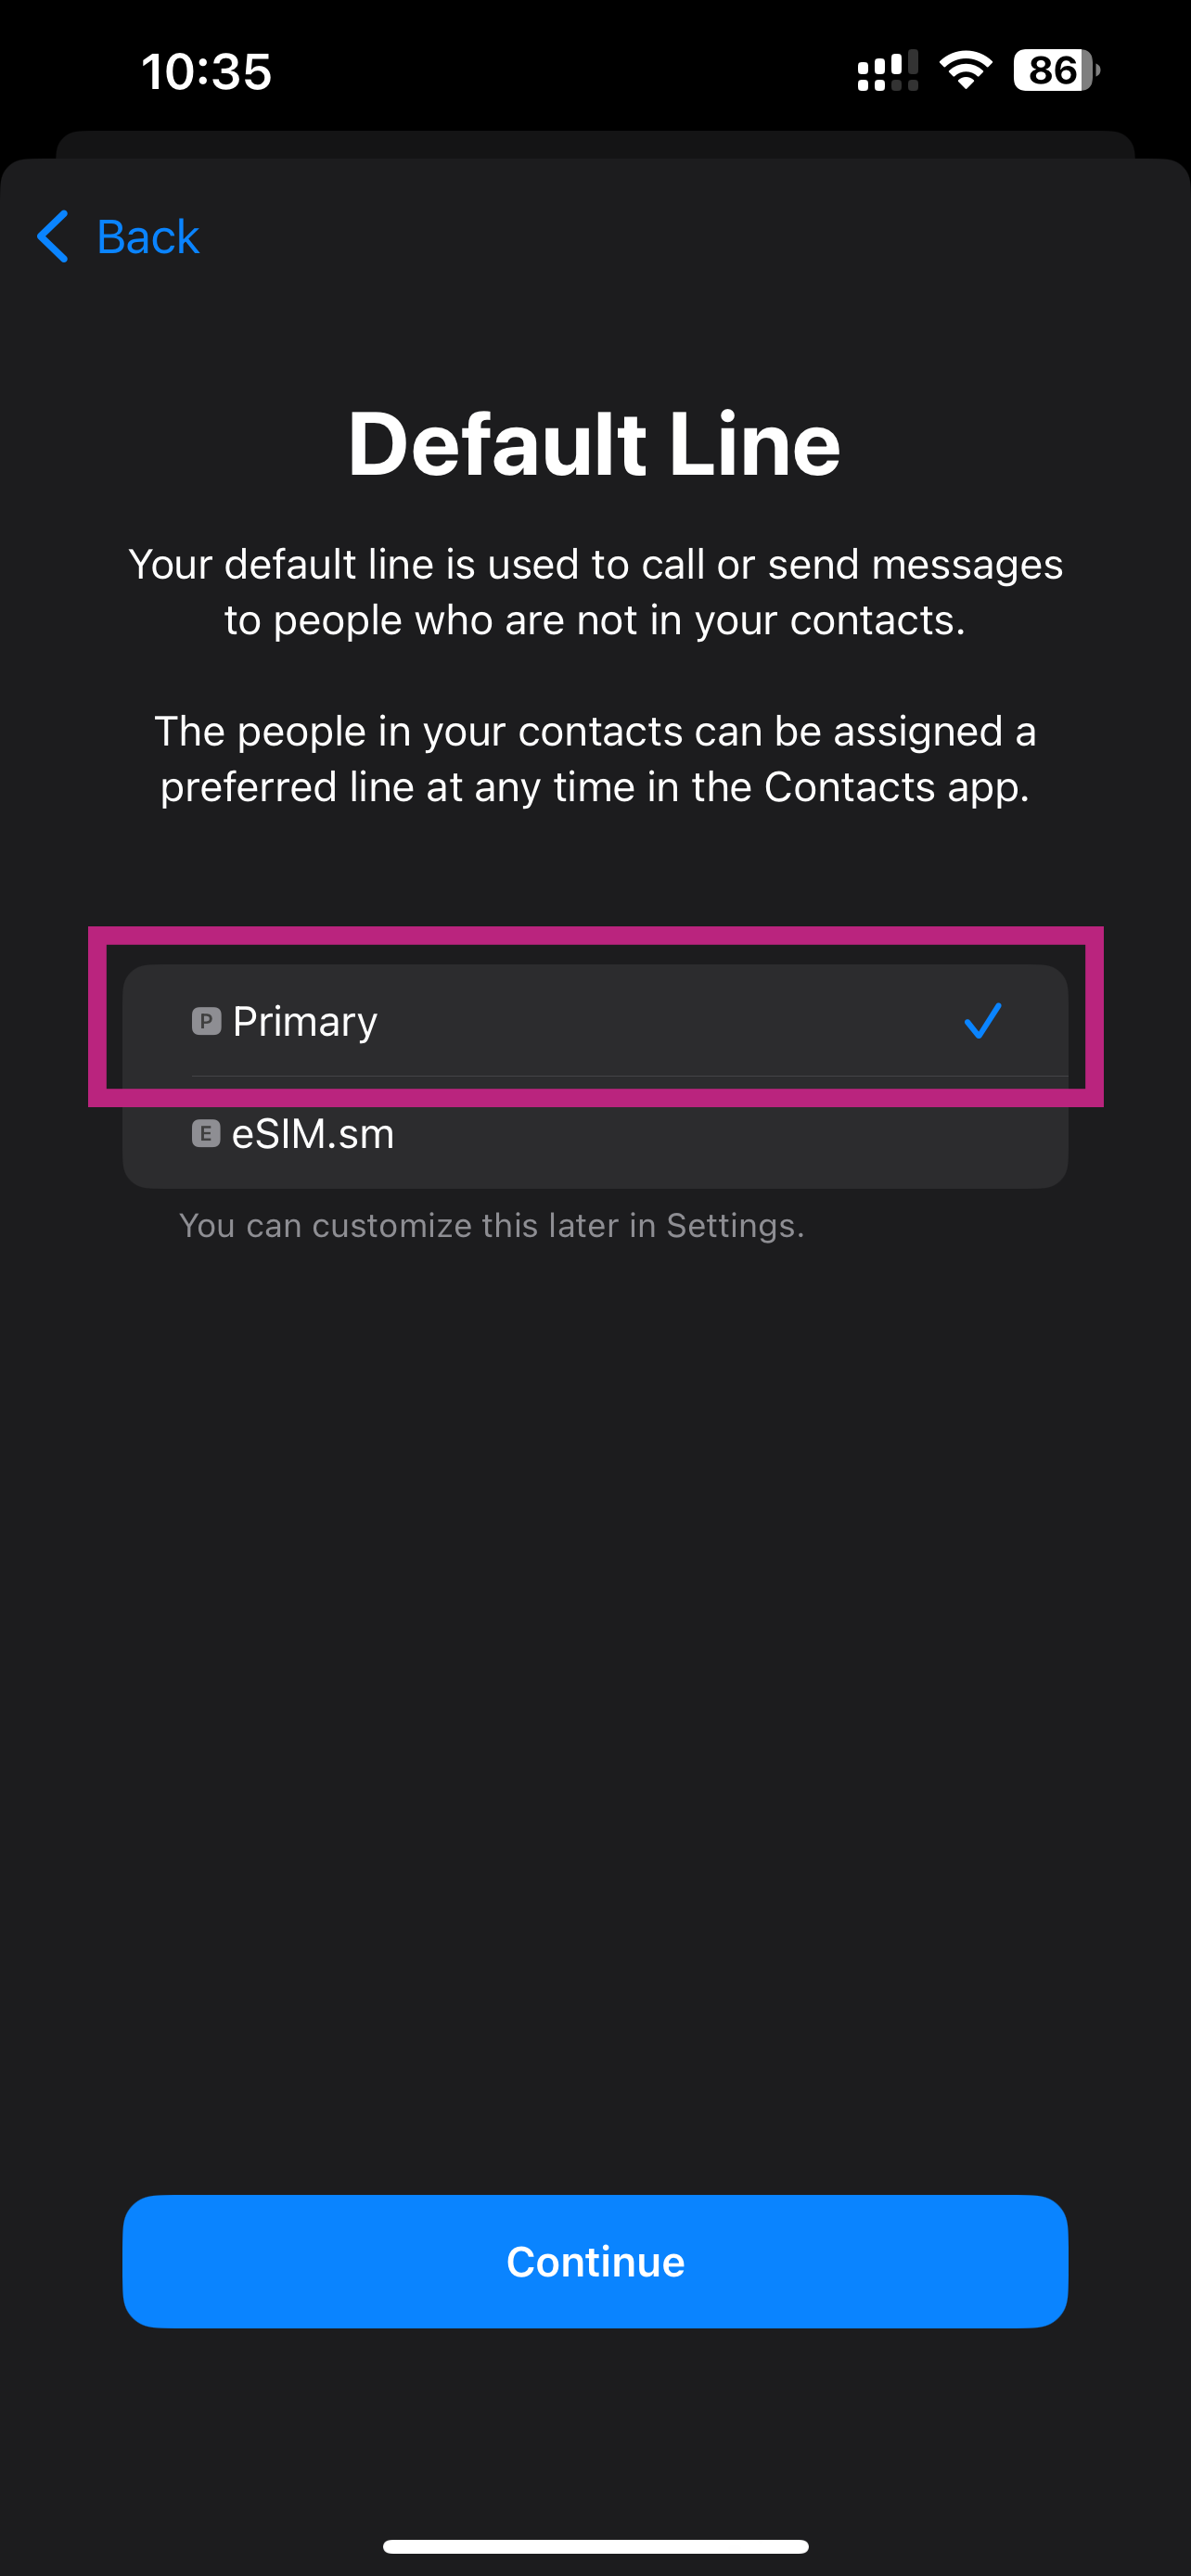
Configure Default Lines
For Default Line (calls & messages) and iMessage & FaceTime, select your Primary SIM. This keeps your main number active for calls and texts.
-
5
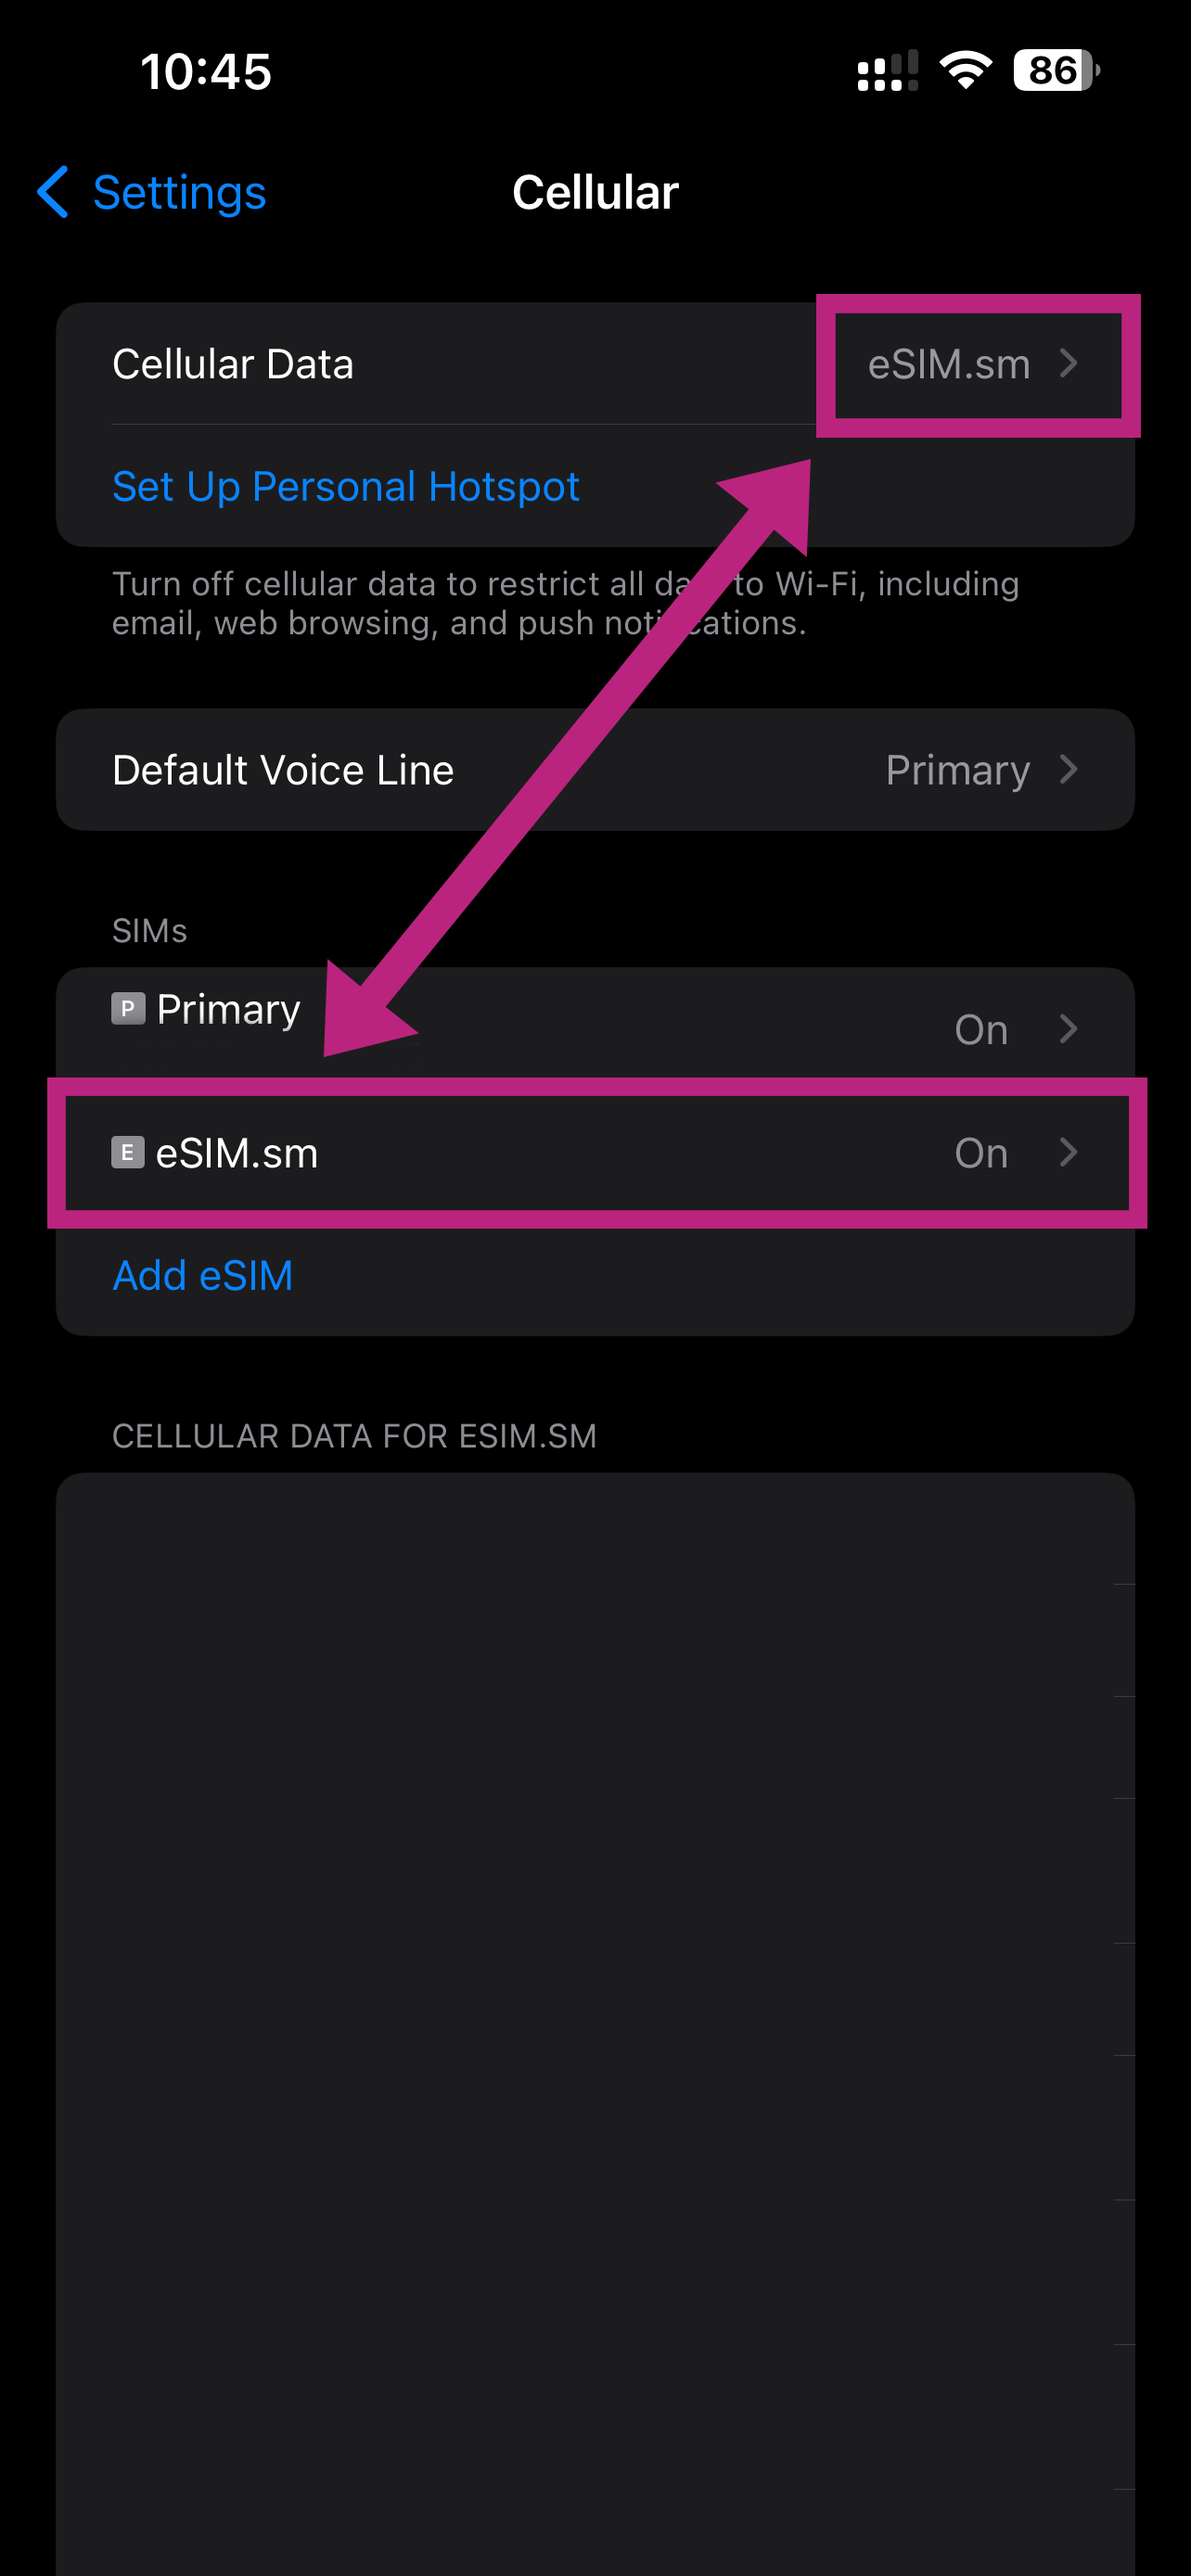
Set Cellular Data
For Cellular Data, select your new eSIM plan. Ensure "Allow Cellular Data Switching" is turned off to prevent unexpected charges on your primary line.
-
6
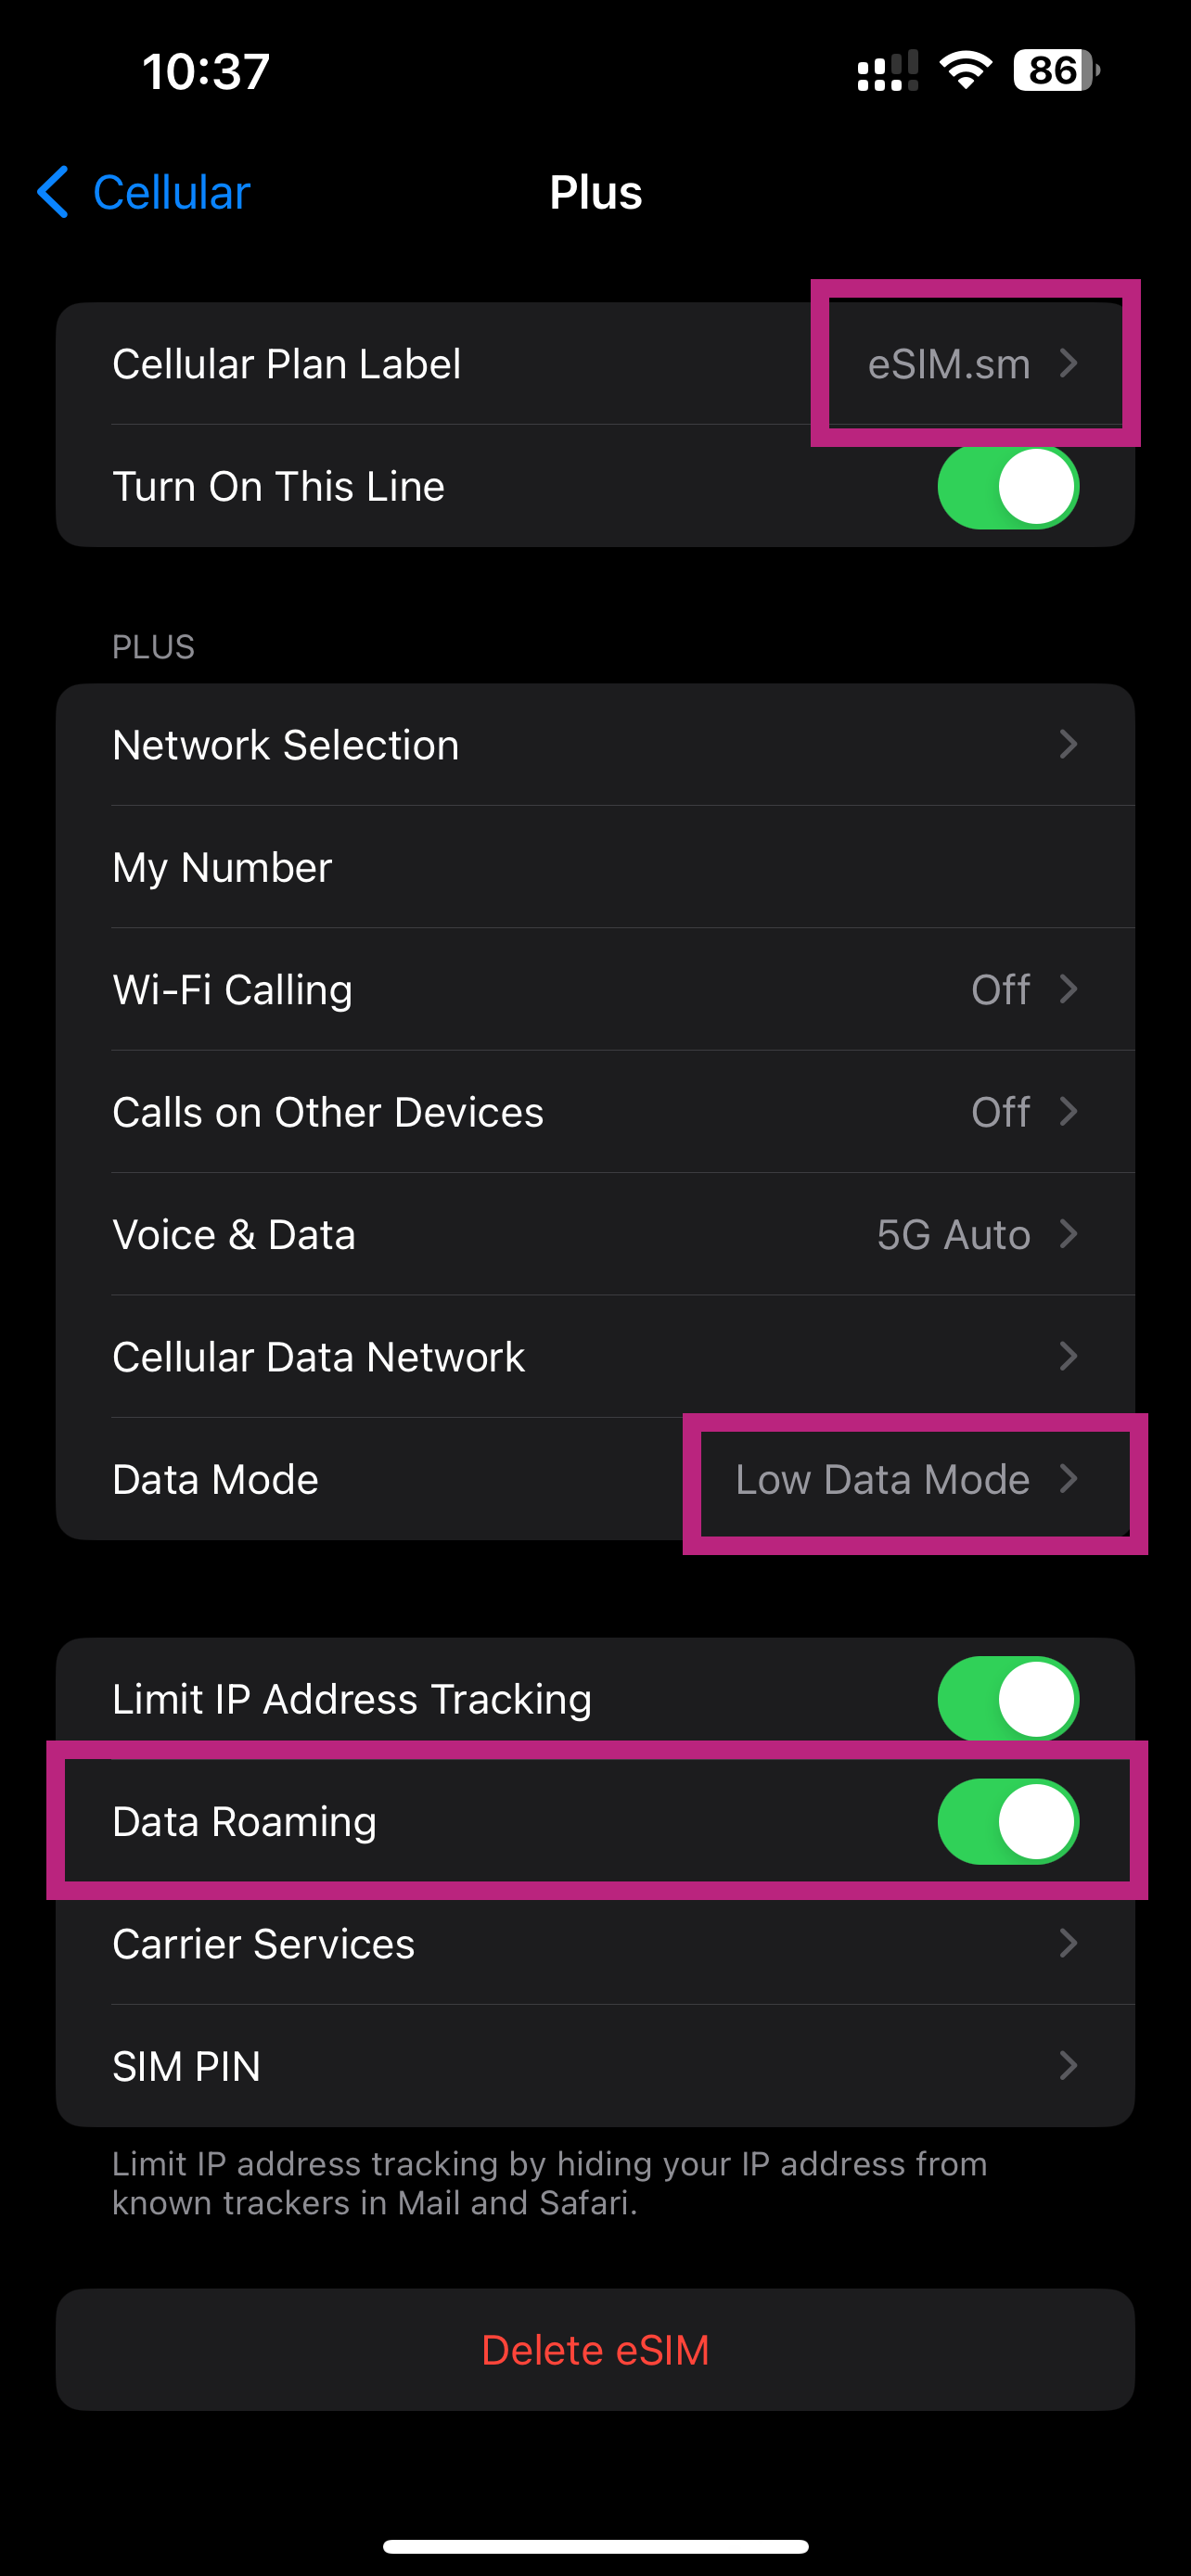
Enable Data Roaming (When you arrive Only)
Go to Settings > Cellular, tap on your new eSIM plan, and make sure Data Roaming is turned ON. This is required for the eSIM to connect to our partner networks. Please note that for Turkey, you may need to add an APN: isp to allow the the connection to work
Method 2: Manual Installation
-
1
Enter Details Manually
If you can't scan the QR code or install using the quick install link, go to the Add eSIM screen and select Enter Details Manually at the bottom.
-
2
Input Activation Info
Copy and paste the details from your installation email into the corresponding fields.
SM-DP+ Address:
LPA.1.EXAMPLE-ESIM.COMActivation Code:
12345-ABCDE-67890-FGHIJ -
3
Complete Setup
Follow the on-screen prompts to activate your eSIM. Then, return to Step 3 of the QR Code guide above to configure your line labels, default lines, and data settings.
You're All Set!
Your eSIM should now be active. Here's a quick checklist:
- You see two network signal bars at the top of your screen.
- Your new eSIM is selected for Cellular Data.
- Data Roaming is enabled for your new eSIM.